



Devices
All devices (inverters, meters, etc. ) in this system are displayed here.
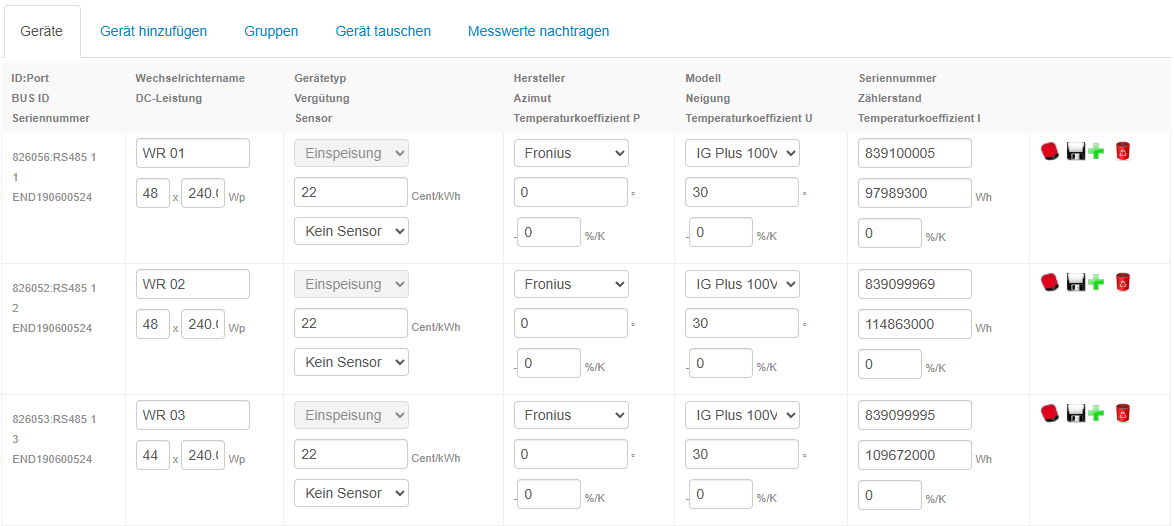
Column 1
ID:Port: unique ID and the port to which the device is connected, e.g. RS485 1
BUS ID: RS485 ID or IP address of the device, e.g. 1
Serial number: The serial number of the data logger to which the device is connected, e.g. END190600524
Column 2
Inverter name: Name, e.g. WR 01
DC power: connected DC power. Number of modules x module power, e.g. 48x240Wp
Column 3
Device type: The device type is taken from the e.manager
Tariff: Feed-in tariff in cents/kWh, e.g. 22
Sensor: If a solar irradiance sensor is available, you can link it to the device.
Column 4
Manufacturer: Here you can select the inverter manufacturer. You can then select the model.
Azimuth: The azimuth is an angle and is specified in degrees (°). It indicates by how many degrees the PV modules (module plane) deviate from the optimum south-facing orientation.
Exact south-facing orientation = 0°
Example:
South-east orientation = e.g. -15°
South-west orientation = e.g. +15°
Temperature coefficient P: in %/kelvin, optional for more accurate fault detection
Column 5
Model: Here you can select the inverter model
Tilt: The tilt is the angle of inclination of the modules (roof pitch) (optimum = 30°).
Temperature coefficient U: in %/kelvin, optional for more accurate fault detection
Column 6
Serial number: Serial number of the inverter
Meter reading: Here you can adjust the meter reading, e.g. after a replacement
Temperature coefficient I: in %/kelvin, optional for more accurate fault detection
Column 7
Save icon (floppy disk): Whenever you make an entry or change, a floppy disk icon appears on the right. To save, click the icon once so that a green tick appears as confirmation.
MPP (red inverter): This is where the MPPs are set, see below
Channels (green plus): This is where the AC and DC channels can be adjusted, see below
Delete (red bin): The inverter is removed from the system. All data is retained and the inverter can be added again later.
MPP tracker
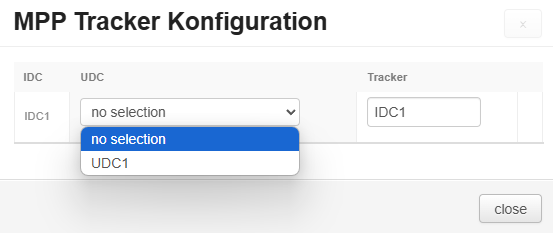
Because every manufacturer measures DC power differently, you need to link the DC voltage and the DC current here once.
Some inverter types measure only one common voltage but several DC currents.
Channels
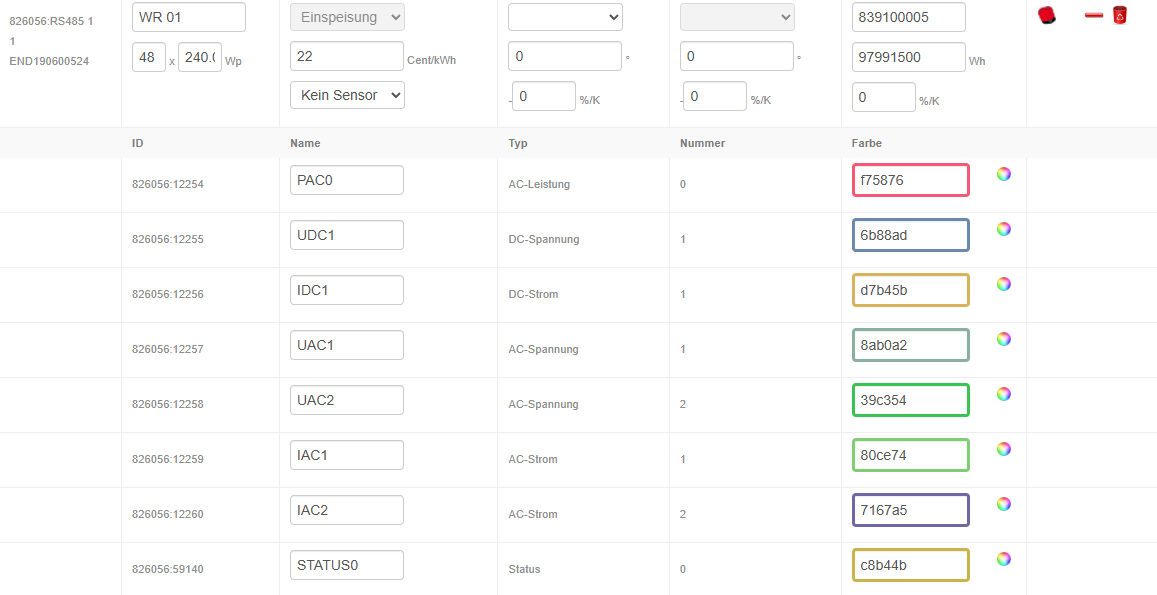
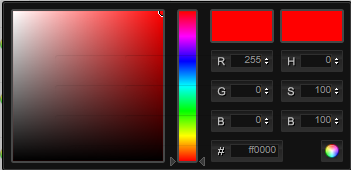
Here you can adjust the name and the colour. These are used, for example, on the MPP page or in charts.
Add device
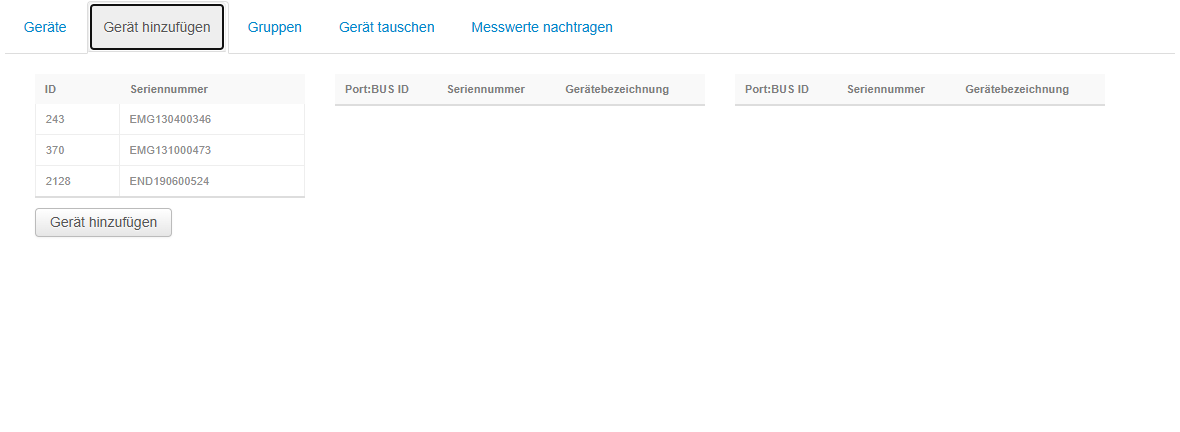
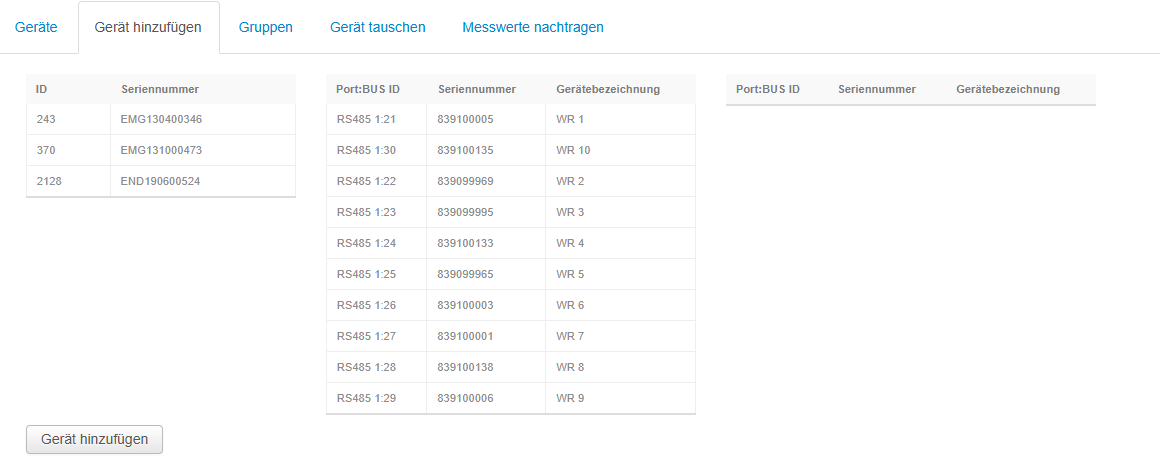
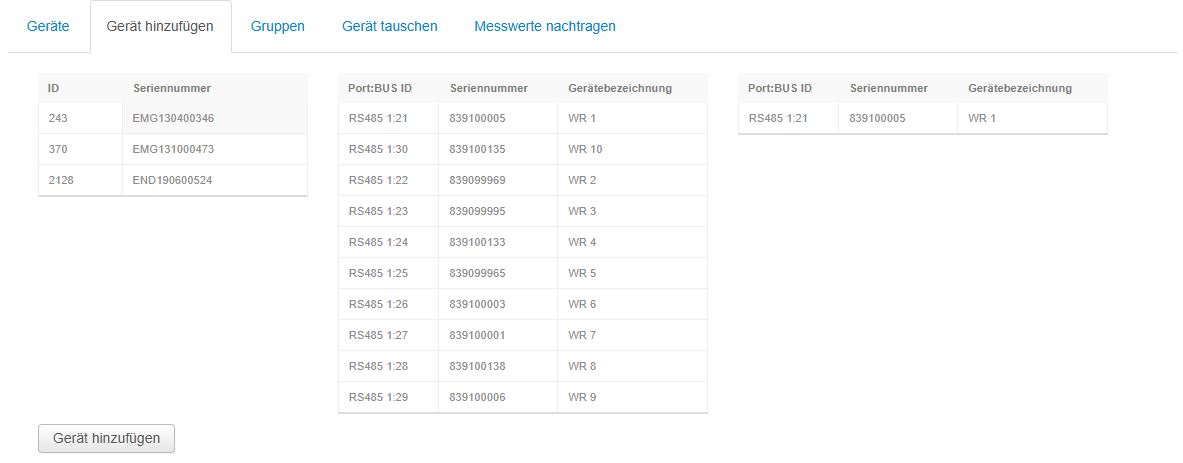
If you have replaced a device, please use the Replace device function
Data logger
Inverters
Add
Save
Groups
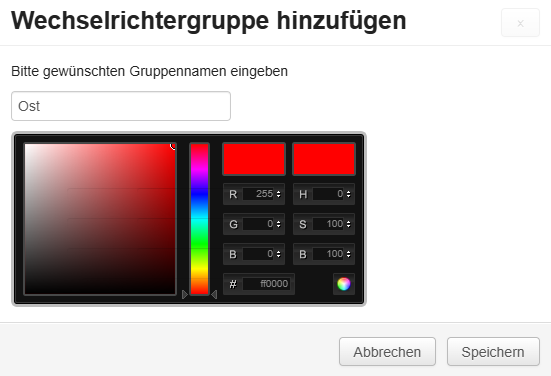
You can create several inverter groups, e.g. if you have an east-west system.
These are then displayed as groups in the daily view.
In fault detection, only inverters in the same group are compared with each other.

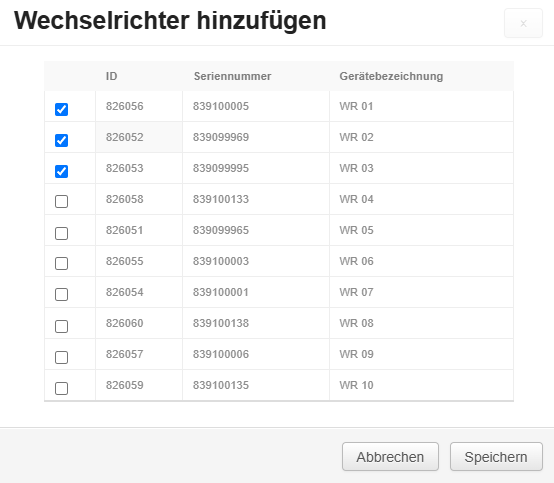
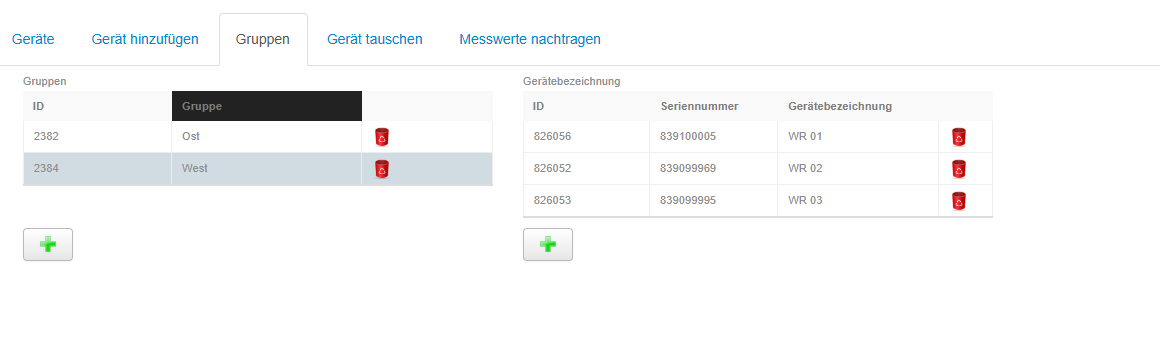
Group
Name and colour
Inverters
Select inverters
Replace device
If you have replaced an inverter on site, you first need to have the new inverter detected by the e.manager.
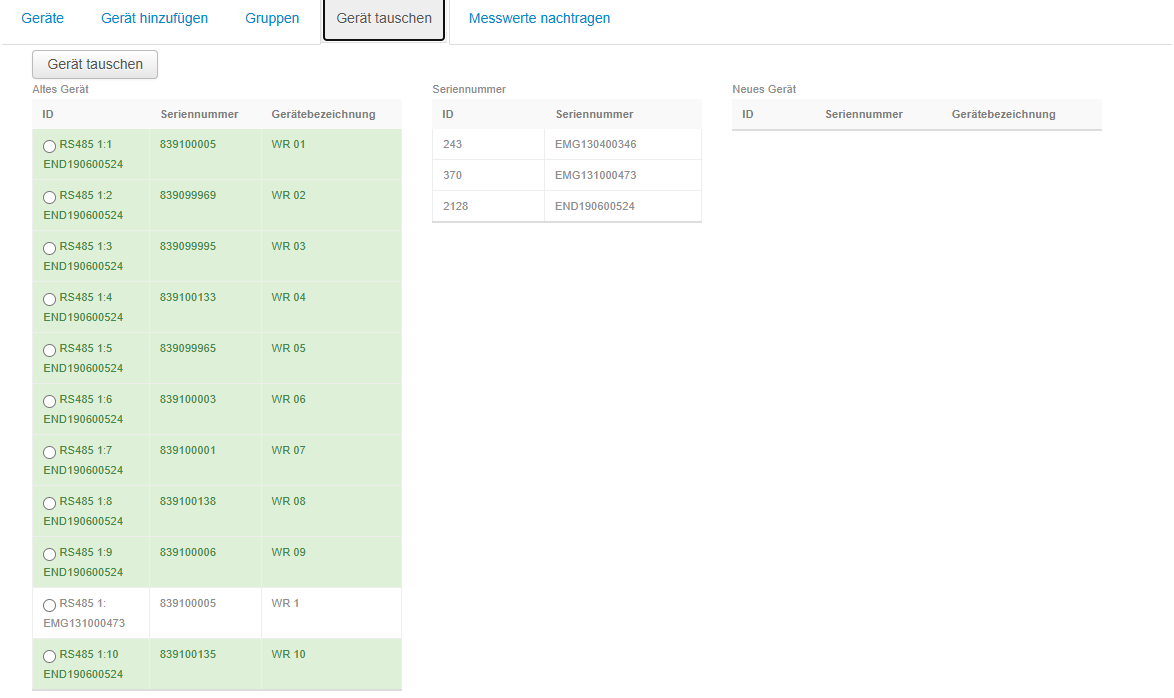
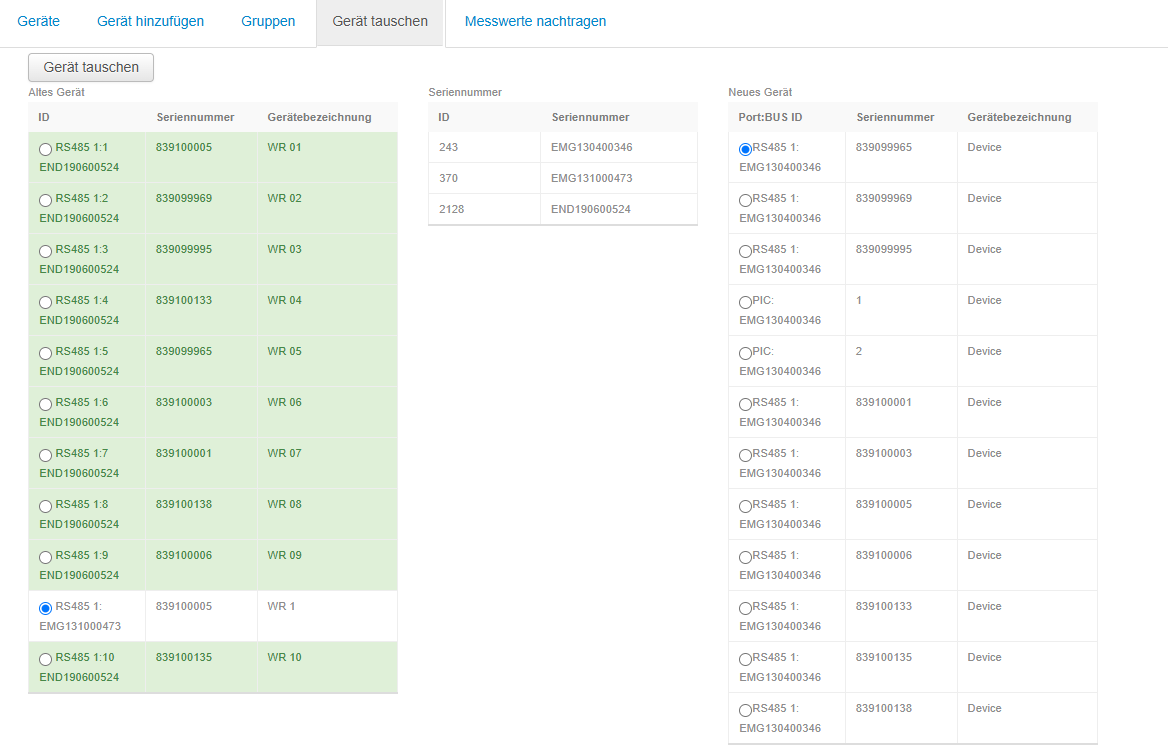
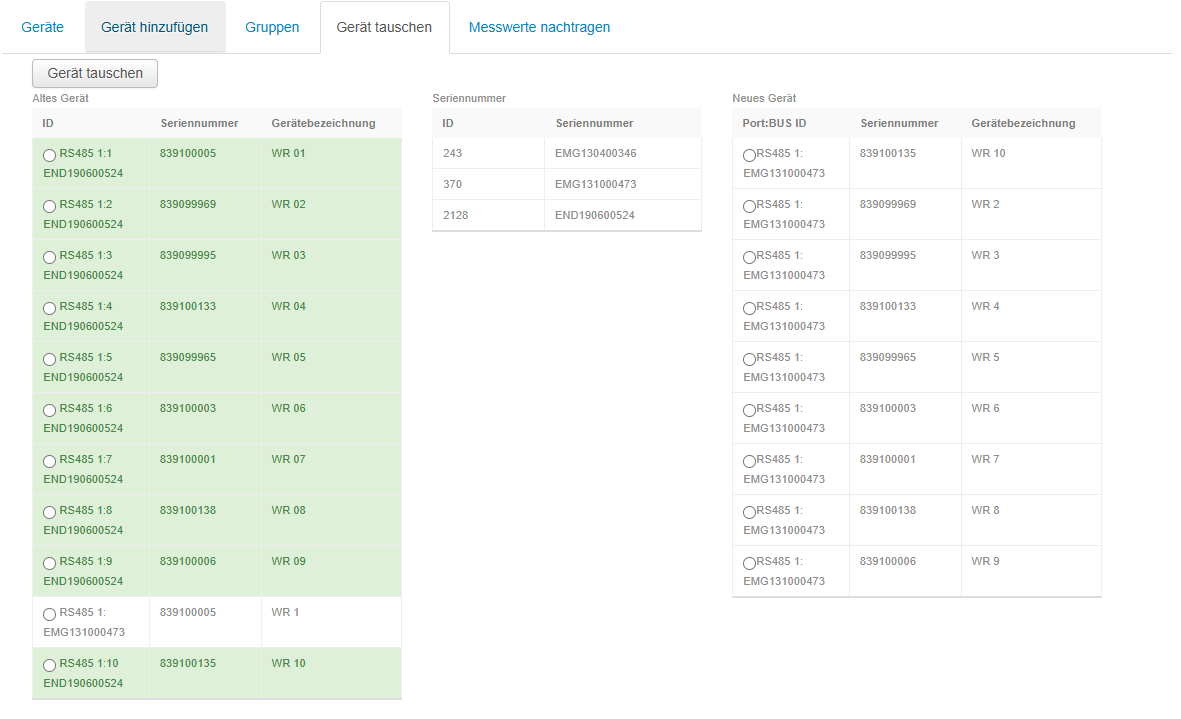
Select e.manager
Old inverter
New inverter
Save
Repeat
Add missing measured values
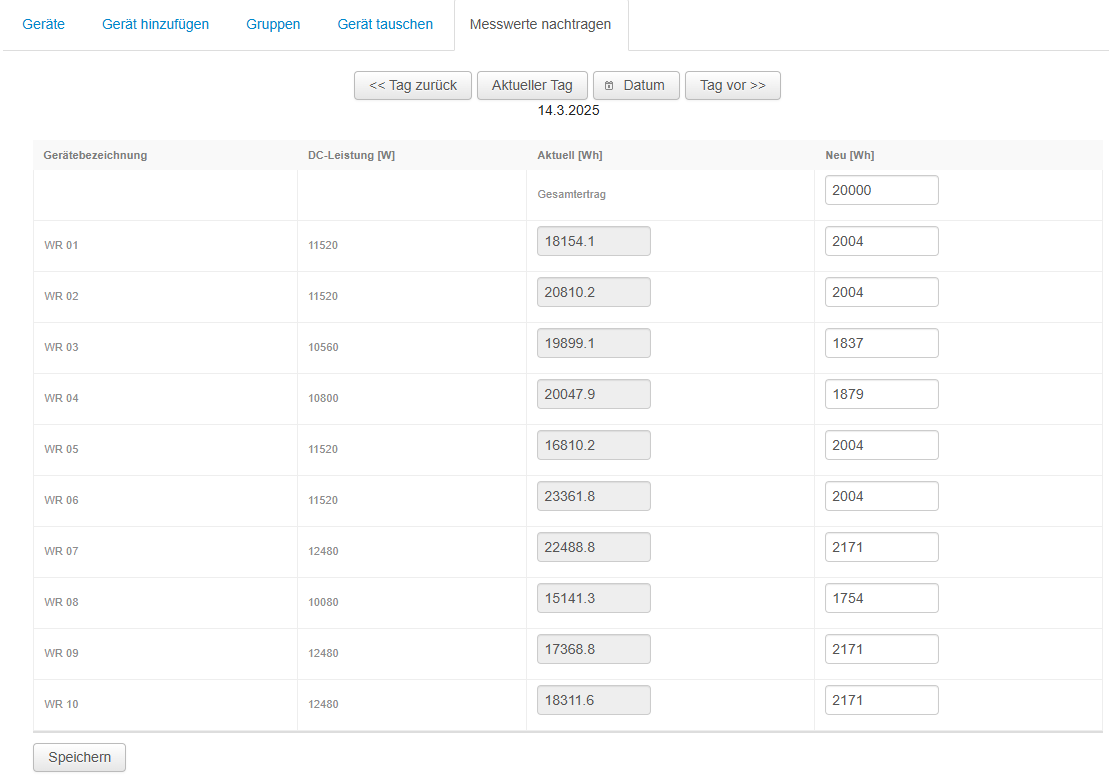
If data is missing due to a longer outage or a later installation, you can add measured values per day here.
The values to be added must be entered in watt-hours (Wh).
Daily values
- You can enter the daily values of each individual inverter here.
- You can also enter the total yield of all inverters in the "Total yield" field. The system then distributes the values proportionally to the inverters according to the connected PV power (DC power). For this, the DC power must have been entered.
- Please do not change the current day, as it will be overwritten with the actual measured values overnight.
Monthly values
- If you want to add monthly values, you can enter the total yield in the "Total yield" field on any day of the month concerned.
However, the monthly view will then show a high value on just one day, and the remaining days will be empty. The total yield in the summary will still be correct.
- Alternatively, you can divide the value to be added by the number of days in the month and enter this calculated value for each day.
Example:
Month: April, monthly yield 2,500,000 Wh
Calculation: 2,500,000/30 = 83,000 Wh
In this case, you must enter the value 83000 (Wh) in the "Total yield" field for each day in April.
General notes
- The entered measured values are displayed in the monthly and annual views immediately after saving.
- If you enter a value for the total yield, it is distributed proportionally to all inverters (provided a DC power has been entered).
- Please do not change the current day, as it will be overwritten with the actual measured values overnight.
- If you do not enter anything, the old measured value is not changed.
- If you want to delete a measured value, please enter 0.